Cleaning, Inspection, and Preventive Maintenance for the Flying Season
The snow has melted in the northern parts of the country and previously dormant hangar doors are starting to open. Flying season is here! But, before you jump back into the air, it’s wise to take some time to prepare your airplane for the busy flying season. Aircraft are meant to be flown, and they can deteriorate quickly when sitting for long periods of time. So, it pays to do a thorough cleaning, inspection, and preventive maintenance as an introduction to the flying season.
Cleaning inside and out
Cleaning in the cold is uncomfortable at best and near impossible in some parts of the country. Take the opportunity that the warm weather brings to give your airplane a thorough cleaning, both inside and out. This isn’t just about cosmetics; it’s about inspection and preservation.
Outside:
Begin by thoroughly washing the outside of the aircraft, removing any bugs, tar, and oil. Using an aluminum-safe cleaner such as Extreme Simple-Green (regular Simple Green is corrosive to aluminum) is one way to go. Follow the wash by protecting the paint with a high quality wax or polymer sealant. We prefer polymer sealants because in our experience they tend to last longer and provide a better barrier to stains from bugs and sap compared with traditional carnauba-based waxes.
The glass on your aircraft requires specific attention as well. Give all of the aircraft Plexiglas a thorough cleaning using plenty of water and your bare hand in order to remove all debris without rubbing it into the glass and creating new scratches. Follow the cleaning by polishing the glass with an aircraft-specific Plexiglas polish such as Plexus, Clear View, LP Aero, or Novus. Finally, open the cowling and clean off the engine, mount, and inside cowl by hand. A little bit of 100LL and a rag (with gloves) goes a long way in removing any built-up gunk and oil.
Inside:
Moving to the inside of the aircraft, begin by removing absolutely everything that isn’t attached to the airplane. Get a cardboard box and begin filling it with all the charts, pens, checklists, flashlights, rags, batteries, etc. If you’re like most people, you’ll have to stop halfway through the process in order to go find a bigger box. Once the aircraft is empty, vacuum it thoroughly and clean the panel and windows from the inside.
Inspection time
Inspections should not be just annual events, and you don’t need to be a licensed mechanic in order to take a closer look at your airplane and its systems. Trace every system of the aircraft looking for leaks, mechanical issues, and corrosion. It doesn’t take long to open the inspection covers on an aircraft and it’s often the only way to get a glimpse of the control and fuel systems of the aircraft. Look for signs of blue staining around all fuel hoses, injectors, etc. Check the drains on the fuel pumps and the distribution spider on fuel injected engines. Cold temperatures are particularly tough on the rubber diaphragms in these components and it’s not uncommon to find leaks after a long, cold winter.
The control system is also subject to wear during the extreme temperature swings of winter. Using a soft cotton rag, gently run the rag over the control cables, especially near where they pass over pulleys. If the rag snags on strands poking out of the cable, have your mechanic take a look to see if the wear is within legal specs.
Lubrication, Protection, and Battery Care
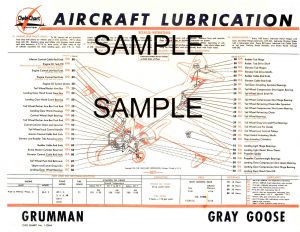
Almost every aircraft has a lubrication chart, which includes locations for lubrication, types of lubricant, and the recommended lubrication intervals for each component. Unfortunately, many owners have never seen the charts for their aircraft.
Take this opportunity to go through the chart and lubricate everything that calls for regular attention. These charts are very specific about the types of lubricant. Some areas require heavy lubricants such as greases while other locations can only use dry lubricants that will not attract dirt and grit. We’ve seen the problems caused by improvising in critical areas, so stick to the manufacturer’s recommendations. We also recommend using this springtime cleaning as an opportunity to treat bare surfaces of the aircraft to protect against corrosion. We like to wipe down areas such as the firewall with either ACF-50 or CorrosionX to keep everything clean and protected. Also, make a point to coat any electrical contacts or terminals that are regularly exposed to the elements.
As a last step, start the summer off right by doing some routine battery maintenance. Batteries take a beating in cold temperatures. We recommend removing the battery from the aircraft, inspecting it, and charging it using an aircraft-specific charger.


